Overview
Sometimes you find that some faxes are routing properly while others do not or you would like to have faxes go to just one user for security purposes. Whether the lines are digital or analog, DTMF/DID routing is a great option for getting your faxes from FaxMaker to the correct end-user. This article explains how to configure DTMF/DID routing in the FaxMaker Configuration.
Environment
Any FaxMaker installation connected to a Call Manager/PBX providing DID/DTMF information to the fax server with inbound calls.
Solution
Lines and Devices Requirements
- Configure the number of DID/DTMF digits to capture from the GFI FaxMaker device settings.
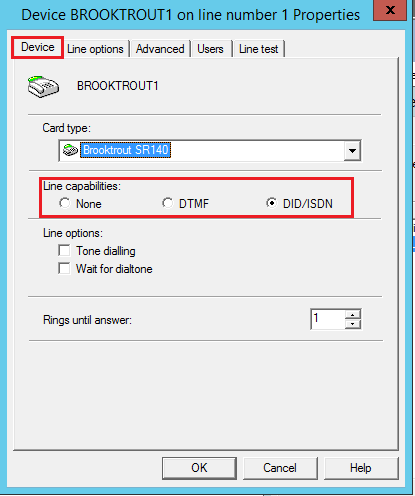
- From the FaxMaker Lines/Devices node, open the properties of the line(s) you would like to configure for DID/DTMF routing.
- On the device tab, under Line capabilities ensure DTMF or DID/ISDN is selected. DTMF for analog lines, DID/ISDN for digital lines.
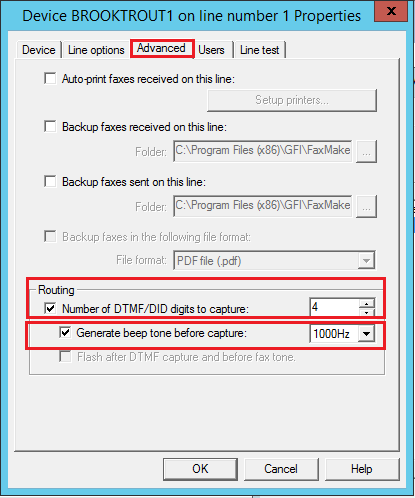
- Navigate to the Advanced tab and configure the number of DTMF/DID digits to capture the number of DTMF/DID digits required.
- The "Generate beep tone before capture:" should only be selected if using a DTMF device. Most devices will not require the use of this selection but have only been needed with actual modems or Mainpine boards historically.
- The "Flash after DTMF capture and before fax tone" checkbox will always be grayed out as it is no longer used.
- Repeat steps 2 through 6 on each line you would like to include with your routing. In most cases, this would be all lines.
Creating the Routing Rule
Add DID/DTMF routes one-by-one.
- From GFI FaxMaker Configuration, expand Routing > right-click DTMF/DID and select New….
Configure the following options:
|
Option |
Description |
|---|---|
|
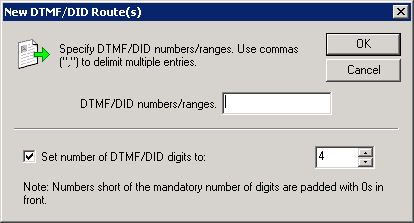
DTMF/DID numbers/ranges |
Key in the users’ routing number (or virtual fax number). For example, for a 4 digit DID enter the last 4 numbers. A range of 4 digit DID numbers would be 1100-1199 |
|
Set number of DTMF/DIDdigits to |
Select this option to set the minimum number of digits for each number. For example, if this value is 4 digits, number 1 is noted as 0001. |
- Click OK and repeat for all DTMF/DID numbers/ranges.
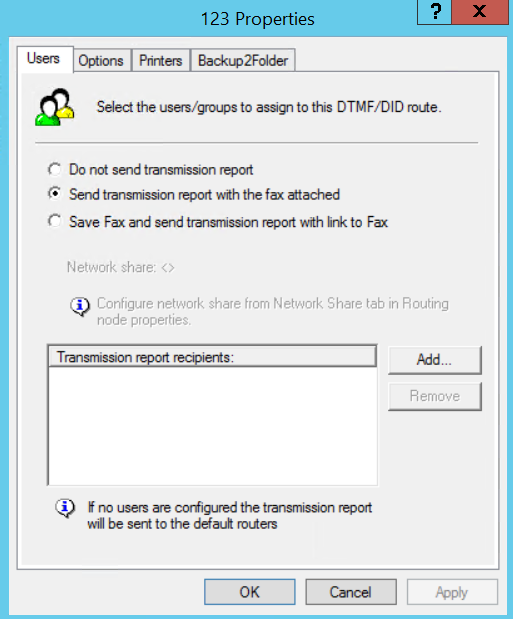
- Once the DID number is set, the routing properties box will appear for you to configure where the fax will be routed. The tabs are listed with their options:
- Users: This tab configures transmission report options and users and/or groups who will receive the fax and are FaxMaker licensed users. The email sent will be addressed to the user's email address or the group's email address.
- Options: This tab is for reconfiguring the number of DID digits in the rule.
- Printers: This tab is for setting up any inbound autoprinting.
- Backup2Folder: This tab is for faxes that need to be deposited into a folder location. Ensure the FaxMaker Fax Server service has access to this folder when assigning.
Importing a range of users
You may also import a range of DID routes From a CSV or TXT file using the Importing DID/DTMF Numbers into the GFI FaxMaker Configuration for Fax Routing article.
Confirmation
Upon completion of the steps above to configure DTMF/DID routing, the faxes received will now be routed to the correct end-user.
Priyanka Bhotika
Comments