Overview
This article provides information about the possible options by which the XCAPI license is bound to the machine it is currently installed on, and how to move XCAPI licensing to another machine.
Environment
Any FaxMaker installation using XCAPI as a fax device.
Solution
TE-Systems XCAPI is a software-only Fax over IP (FoIP) solution. As it is a software device, it requires its own license, in addition to the FaxMaker license. It is licensed by means of an Activation code and bound to a device either via hardware address or virtual ID.
Moving the XCAPI license will require the following steps:
- Backing up the XCAPI configuration, including the hardware ID and LOD key
- Installing the XCAPI software on the new server
- Importing the configuration from the old server
- Acquiring the new license
Backing up the XCAPI configuration, including the hardware ID and LOD key
- On the FaxMaker server we are moving the configuration from, right-click Start and select Run
- Type Regedit and select OK
- Navigate to the Registry path:
HKEY_LOCAL_MACHINE\SYSTEM\CurrentControlSet\Services\XCAPI
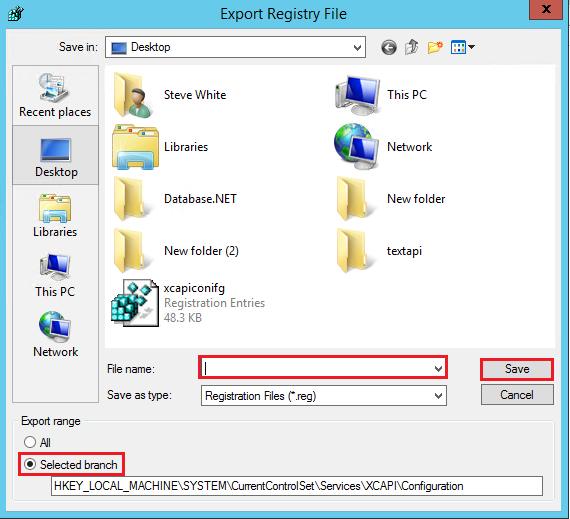
- Right-click the configuration key and select export
- Type the name of the export you would like and ensure the selected branch radio button under export range is selected
- Select Save in the location desired.
The Hardware ID is located in the XCAPI Configuration
- From Programs open the XCAPI Configuration
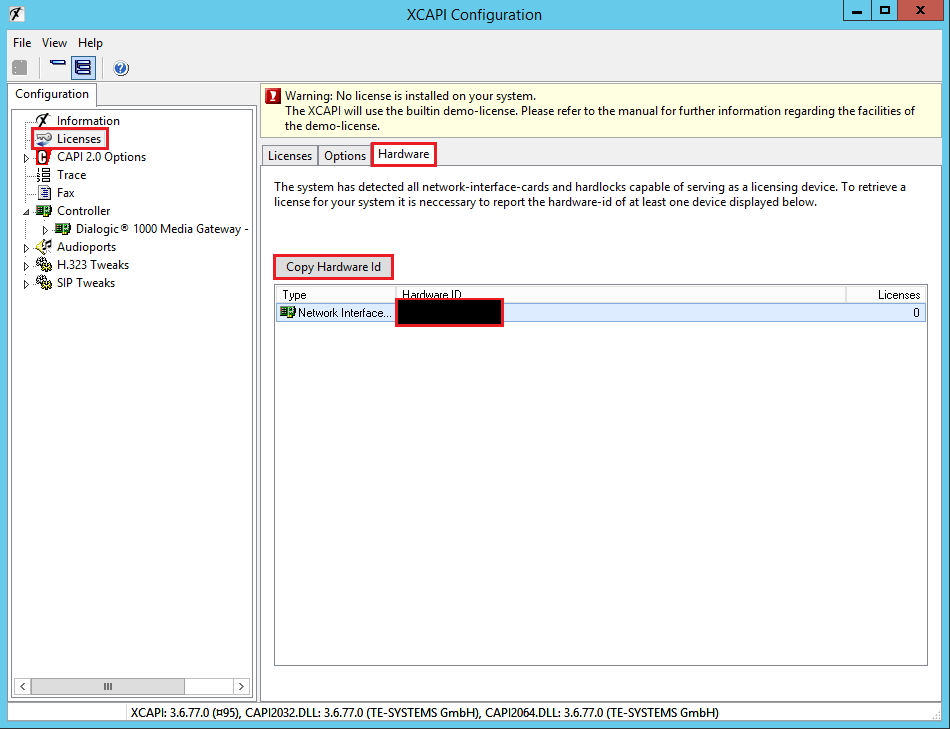
- From the ribbon bar at the top select expert mode as shown in the screenshot below
- Select Licenses and select the Hardware tab in the right pane
- The hardware ID is located in the Hardware ID column. This is outlined in red and blacked out in the screenshot below.
- Once the Hardware ID is selected use the Copy Hardware ID button to copy the Hardware ID to the clipboard and paste to the document where you are backing up the information.
- Finally, the LOD key was received by email after purchase as well as after activation.

Installing the XCAPI software on the new server
XCAPI is installed from the FaxMaker Configuration Wizard after the FaxMaker installation. Review the Installing FaxMaker article and the Installing and Configuring XCAPI with FaxMaker article for these processes.
If you are upgrading FaxMaker, version 20.1 and higher contain XCAPI version 3.6.77. Verify if your SUS (Software Upgrade Service) will support an upgrade to this XCAPI version. You can verify the expiration of your SUS in the XCAPI Configuration.
- From Programs, open the XCAPI Configuration.
- Select Expert Mode from the top ribbon.
- Expand licensing and select a license and review the information in the right pane.
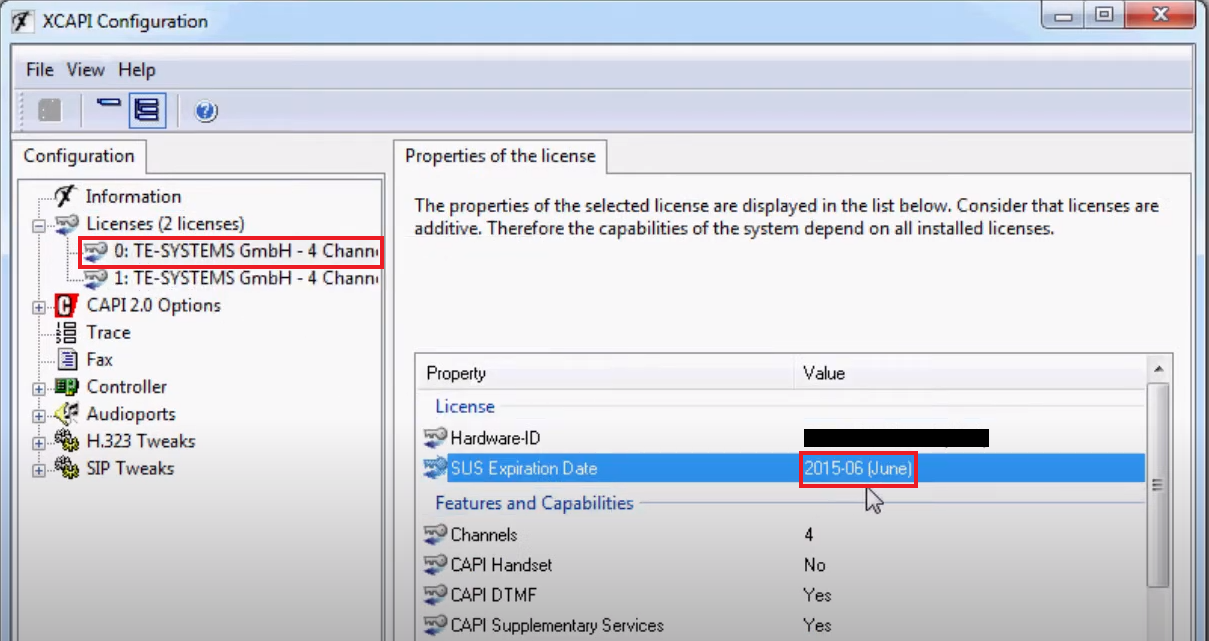
Here you can see the expiration date of the SUS of the XCAPI license. If the date is not current you can verify which version you can upgrade to at the TE-Systems community website, https://community.te-systems.de/. You will need to log in and select downloads to verify the download dates. For example version 3.6.77 was released on Dec 18, 2018. The SUS date in the screenshot would not be able to upgrade to this version and a new license would need to be purchased. You would contact your reseller to do so.
Importing the configuration from the old server
Note: Before importing the XCAPI configuration from the old server, ensure the XCAPI Configuration is not open as the import may fail.
- On the FaxMaker server, we are moving the configuration to, right-click Start and select Run
- Type Regedit and select OK
- When the Registry Editor opens, select File and import.
- Select the Registry export file from the FaxMaker server we are moving from and select OK.
Note: This can only be done using the same CPU architecture. 64 bit to 64 bit, for example. - Once complete, close the Registry Editor and from Programs, open the XCAPI Configuration.
- From the top ribbon, select expert view.
- Select the controller and ensure the controller listed is the same as on the FaxMaker server we are moving from.
- You will need to alter the configuration as the IP address and Ethernet adapter are different.
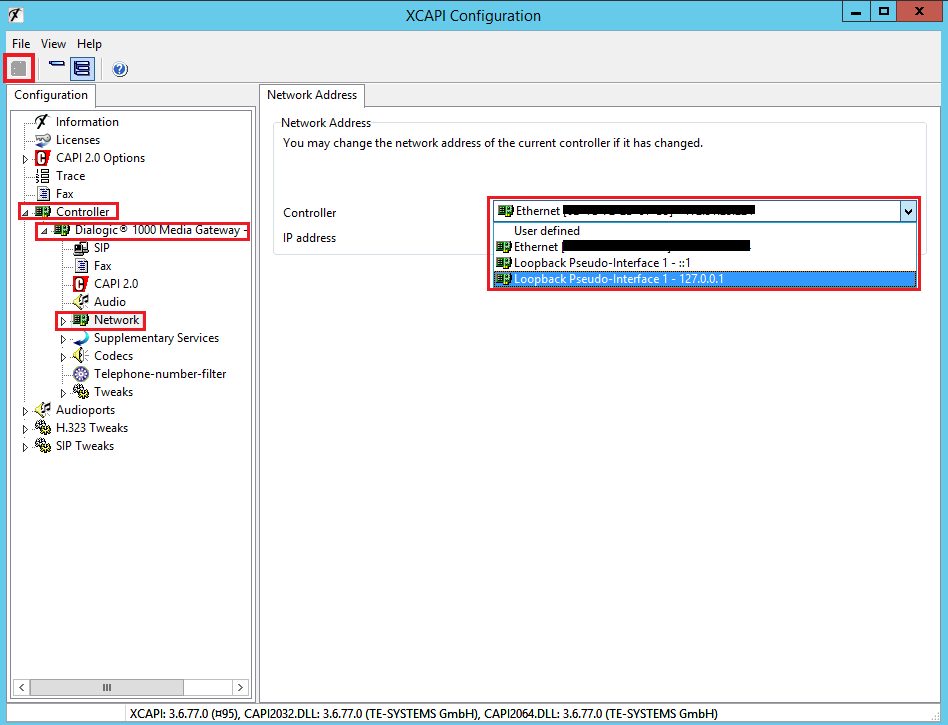
- Expand Controller > expand the title of your controller.
- Select Network and select the correct interface for the dropdown as this will differ from the previous server. The controller type listed in the snapshot below is just an example.
- Select Save from the top ribbon on the left. This is also highlighted in the screenshot above.
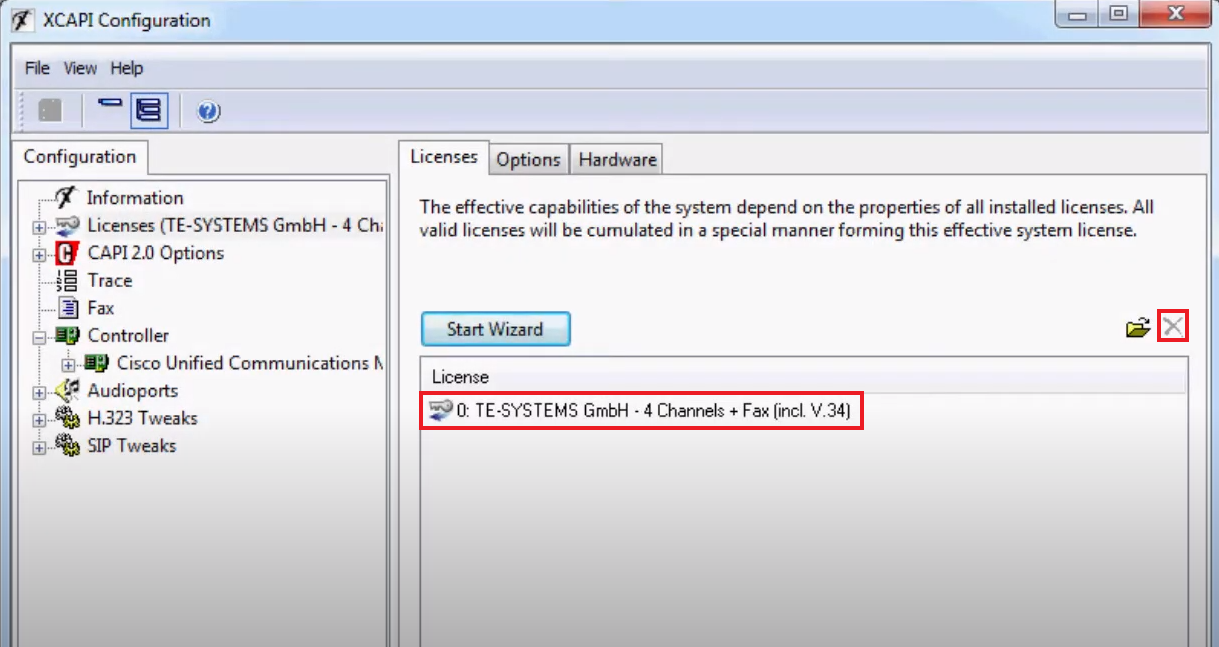
- Expand Licenses and delete the license that was imported with the configuration. Select the license and then select the X to the top right.
Acquiring the new license
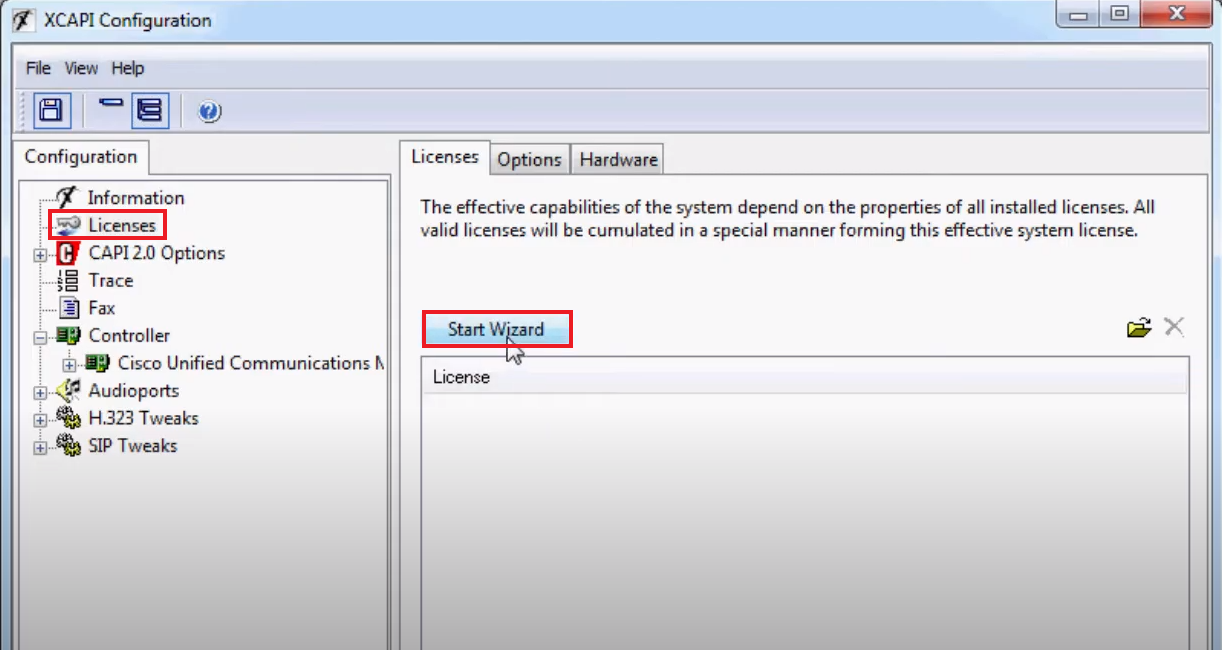
- Continuing from step 12 above, click the Start Wizard button.
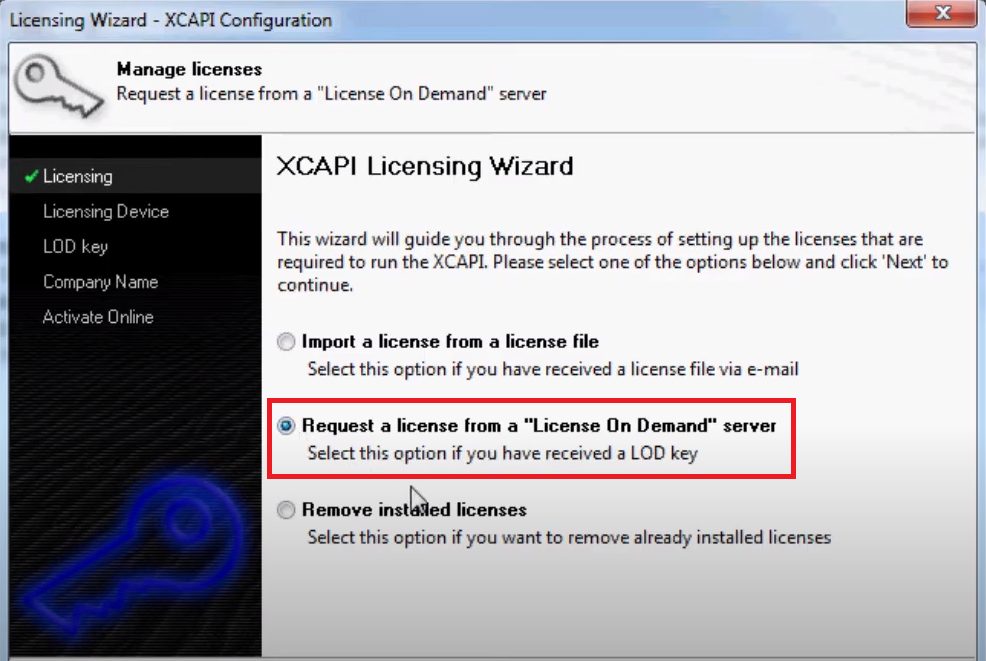
- When the wizard starts, select "Request a license from a 'License on Demand' server" and select Next.
- On the next screen, the wizard will detect the Hardware ID from the server and this will be listed here. Select the Hardware ID and select Next.
- On the next screen, enter your LOD key and select Next. The LOD key was sent to you in an email when the license was purchased or activated. If the LOD key cannot be located at this time, reach out to sales@te-systems.de and send the Hardware ID from the previous server as well.
- On the next screen, select Activate Now to complete the wizard. You will be notified that the license file has been downloaded and you will be asked if you would like to save the configuration. Select yes when prompted.
- If the new FaxMaker server is unable to access the internet or for some reason the activation can be done from another pc or from the TE-Systems website, https://community.te-systems.de/license/.
Confirmation
Upon completion of the steps in this article, the XCAPI license and configuration will be transferred to the new FaxMaker server.
Priyanka Bhotika
Comments