Overview
XCAPI is a software-only Fax over IP (FoIP) solution from TE-Systems. It is a software suite that contains a driver, a test tool, a line monitor, and a trace feature for troubleshooting issues that may arise. This article provides steps on how to install and configure XCAPI for use with FaxMaker as well as other phone systems.
The installation and the setup process of XCAPI with FaxMaker consists of five parts:
- Launching the XCAPI Installer
- Installation
- Setting Up A XCAPI Controller
- XCAPI Configuration
- Configuring XCAPI with a Specific Call Manager or PBX
Environment
Any FaxMaker system setup to use FoIP with XCAPI.
Solution
Please, follow each list of steps to complete the installation and finalize the setup.
Launching the XCAPI Installer
XCAPI installer can be started either from the FaxMaker Configuration Wizard or by launching it individually. Please, see the steps for each option below.
- Installing via FaxMaker Configuration Wizard
- Start the FaxMaker Configuration Wizard either automatically after installation or manually from Start > Programs > FaxMaker Configuration Wizard.
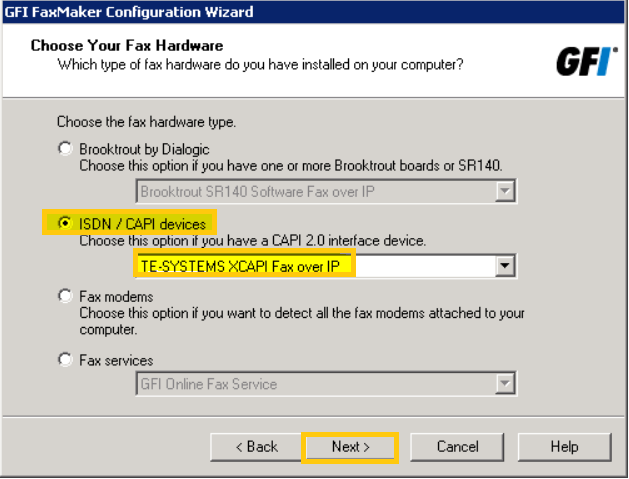
- When you reach the Choose Your Fax Hardware screen, select ISDN / CAPI devices.
- From the drop-down menu, select TE-SYSTEMS XCAPI Fax over IP, and click Next.
- To start the XCAPI Installation Wizard, click Yes.
- Installing by Launching from the Installer
- Navigate to
C:\Program Files (x86)\GFI\FaxMaker. - Find and right-click the XCAPI_Install.exe file.
- Click run as administrator.
Installation
As you started the XCAPI Installer, please follow the steps and the configurations below.
- The XCAPI installer starts with a language selection screen. Please, choose the language you prefer, and click Next.
- As soon as the installer loads necessary files, the welcome screen will be displayed. Select Next to continue.
- On the License Agreement screen, click Yes.
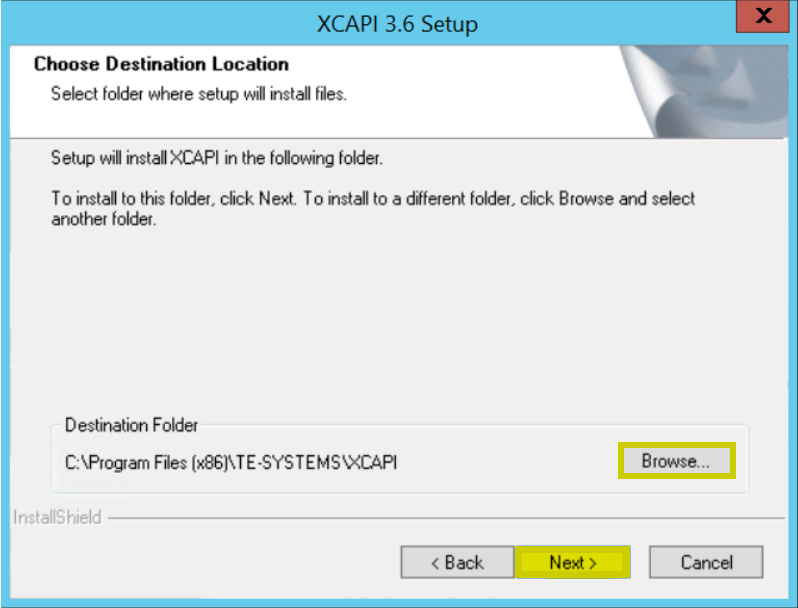
- In the next screen, you can designate where the files are installed. The default option is
C:\Program Files(x86)\TE-SYSTEMS\XCAPI. In case you want to change the destination, click Browse and select the folder you prefer. To proceed, click Next.
- In the next screen, you are required to specify the Start Menu Program folder. XCAPI is the default. Select Next to continue.
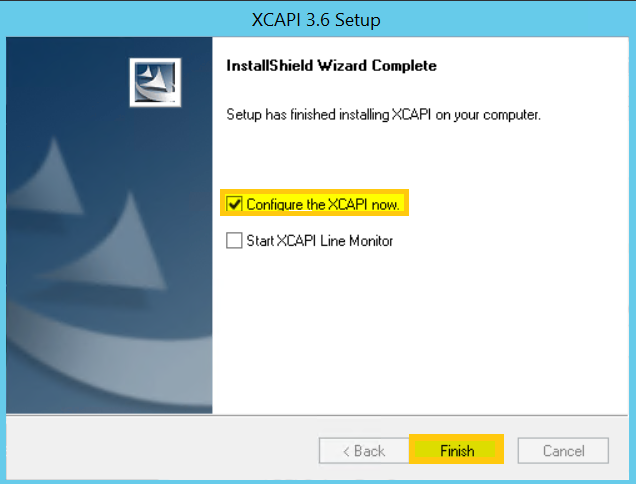
- Before you complete the installation, you will be provided two checkbox items:
- Configure the XCAPI now: In order to run the XCAPI Configuration, select this option.
- Start XCAPI Line Monitor: The Line Monitor is a handy tool for troubleshooting issues, but it is not required for the installation and the setup process.
- Click Finish to complete the installation.
- Along with the XCAPI Configuration, XCAPI Controller Wizard will start in order to assist you in setting up a controller for FaxMaker.

Setting Up A XCAPI Controller
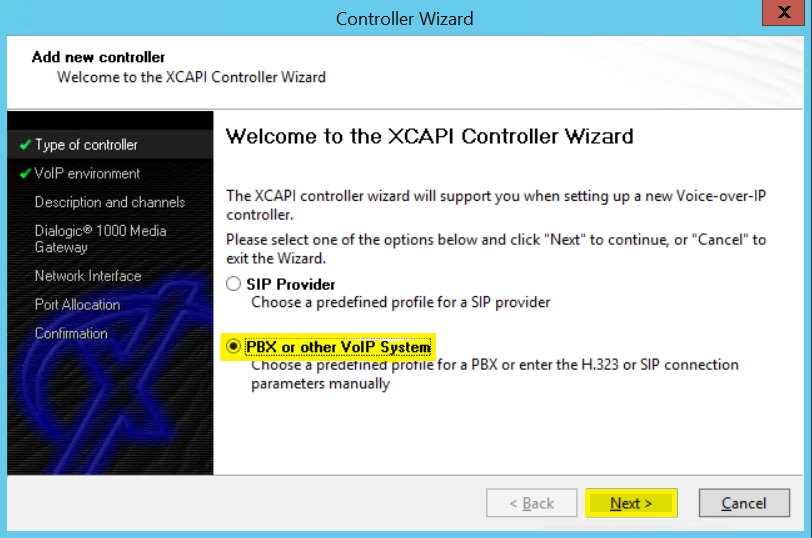
The information required by XCAPI Controller Wizard is environment-specific. Please, choose the right options with respect to your environment.
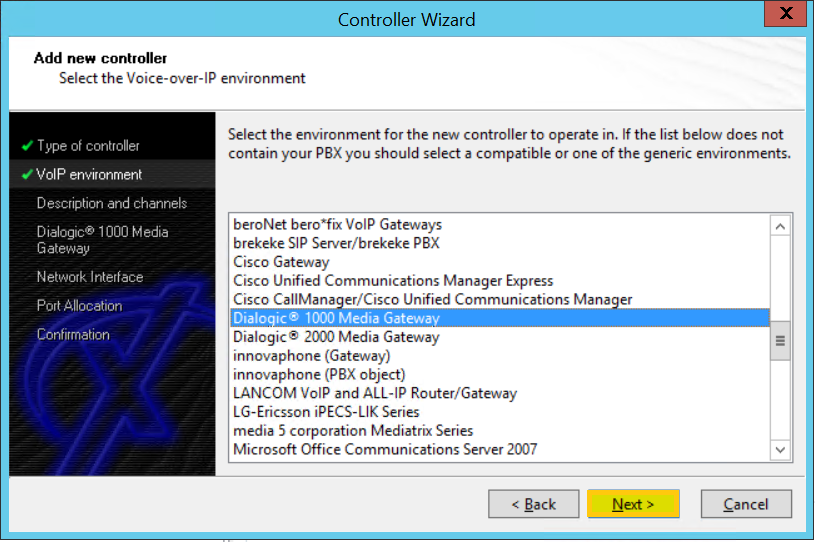
- Initially, the wizard will require you to select your VoIP Environment. Select the correct parameter, depending on whether a SIP provider or a connection to an internal router or phone system is used.
- In the next screen, a list of possible devices will be displayed. Please choose the device or the provider you are using.
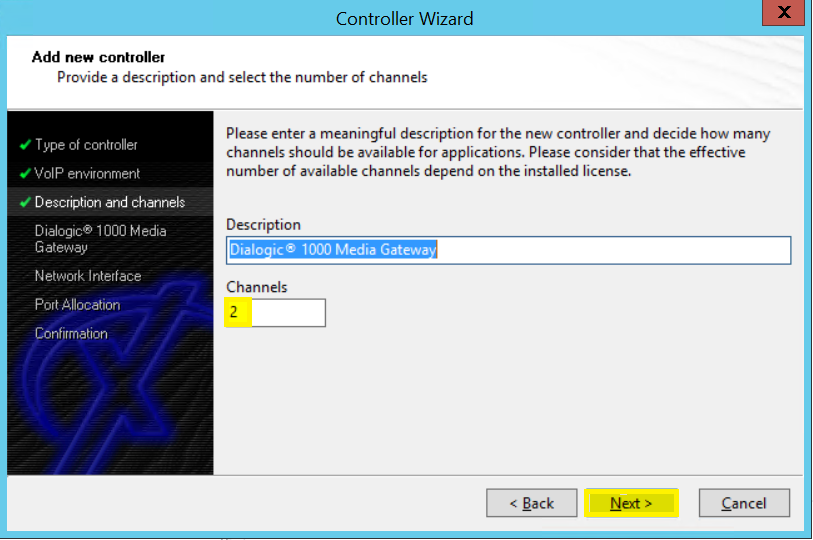
- In the next screen, insert the number of channels you will use and click Next.
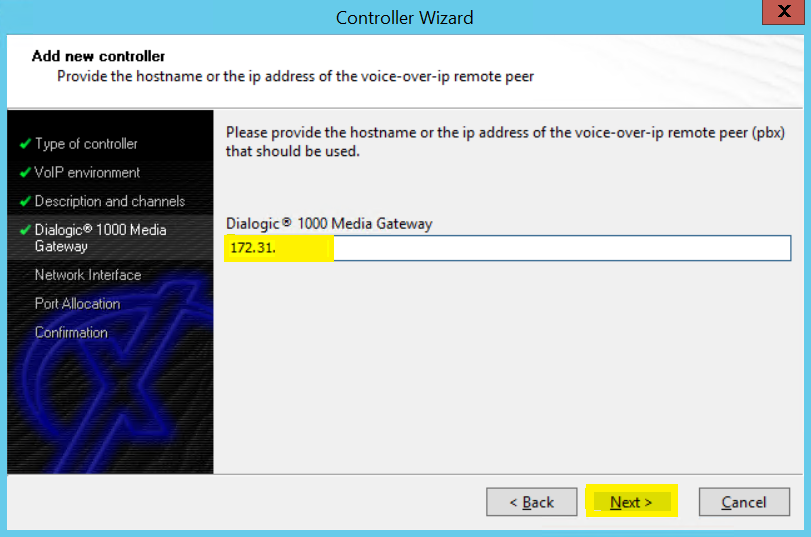
- In the following screen, enter the IP address of the device you use. This will be your phone system or SIP provider etc...
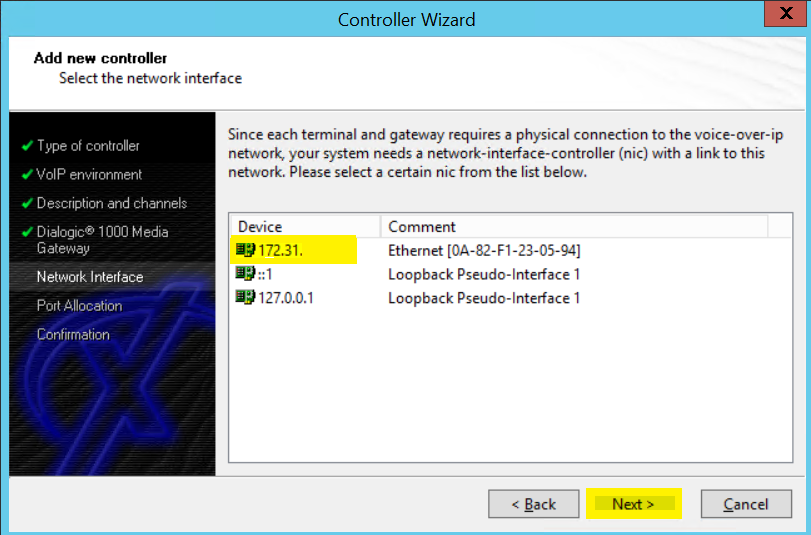
- Select the same IP address in the Network Interface step and click Next to continue.
- In the following screen, click Next as the port allocations are not required.
-
To conclude the Controller Setup, click Finish.
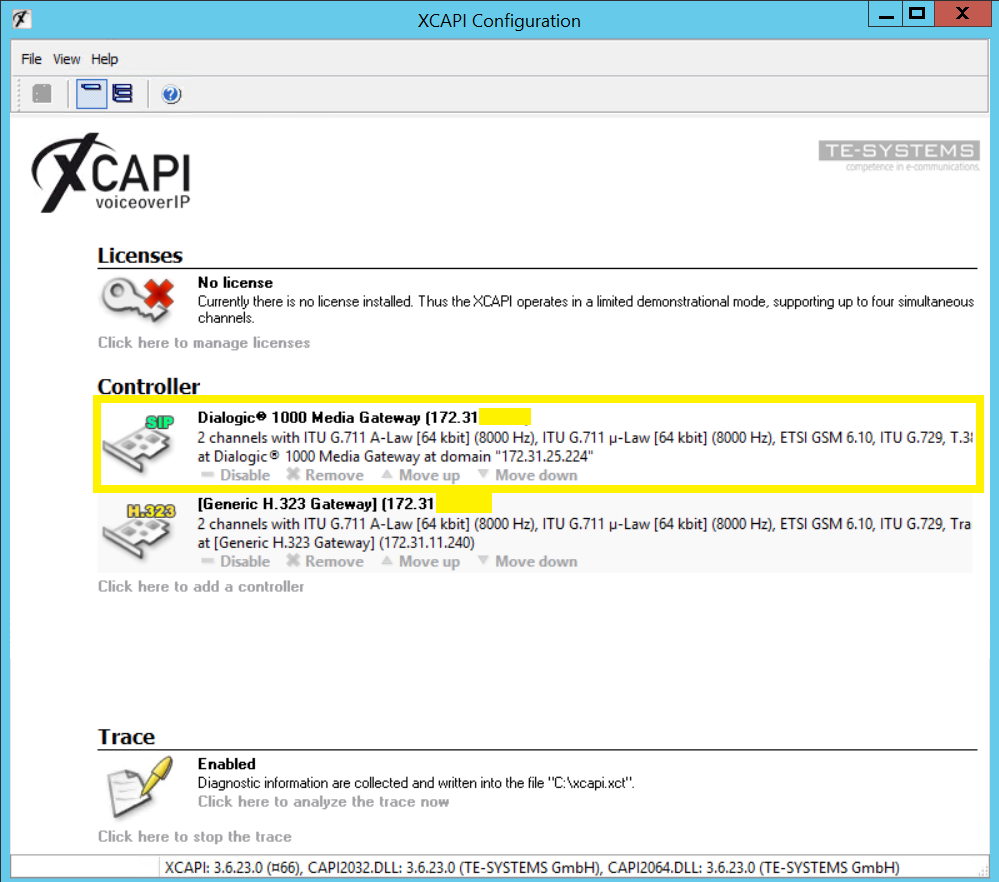
Info! If the setup is successful, the controller is listed in the XCAPI configuration. (Please, see the image below.)
XCAPI Configuration
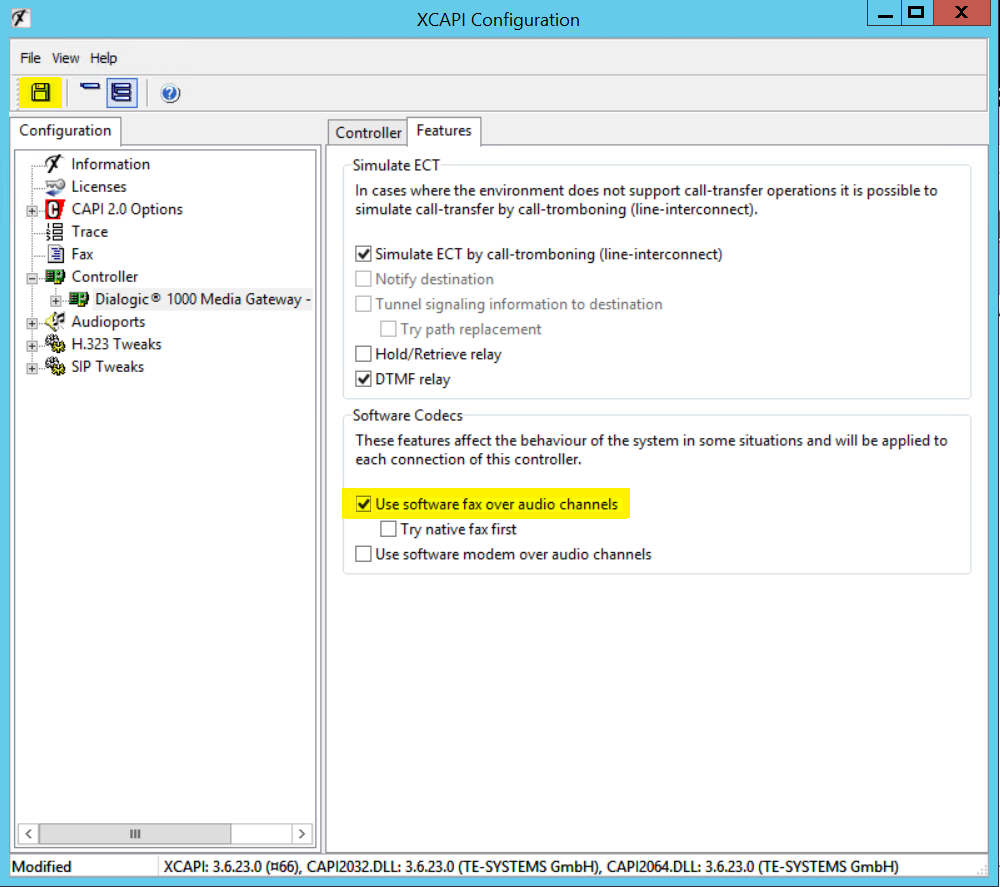
- In the XCAPI Configuration, go to the view menu at the top toolbar, and select the expert view.
- On the left pane, select the controller that was created in the previous section.
- Go to the Features tab.
- Select the Use software fax over audio channels checkbox and then click the Save icon at the top left.
-
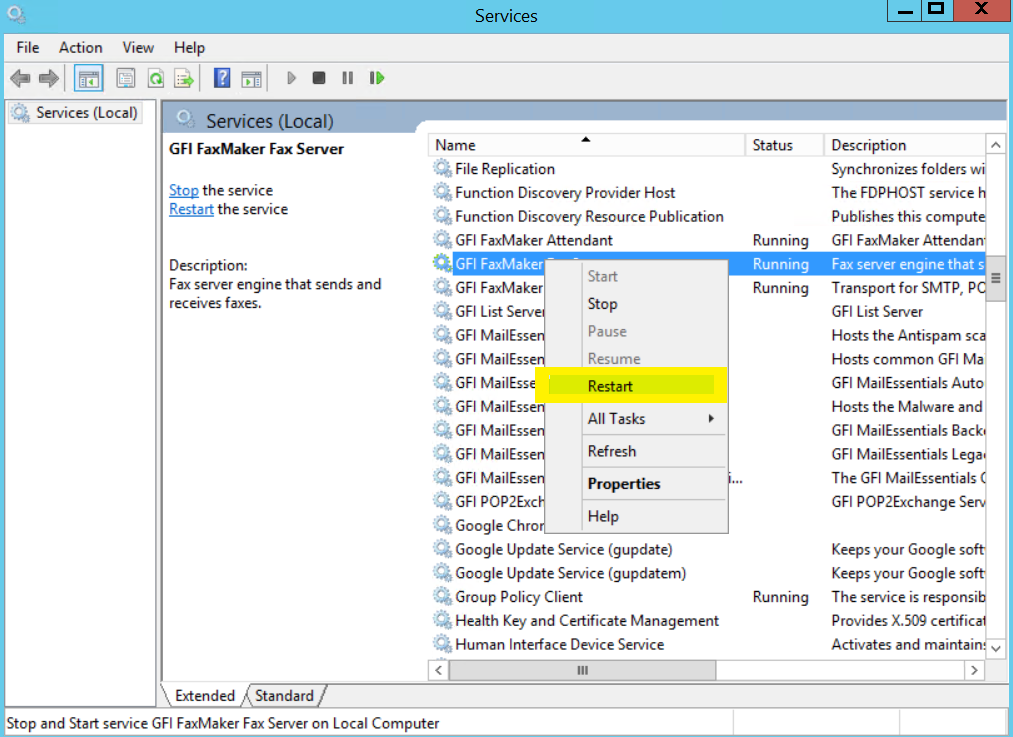
Restart the FaxMaker Fax Server Service in order to be able to use the new controller you set up.
- Right-click on My Computer.
- Click Manage (as administrator).
- Click Services and Applications at the bottom of the left pane.
- Click Services on the middle pane.
- Right-click on FaxMaker Fax Server, and click Restart.

Adding New Lines
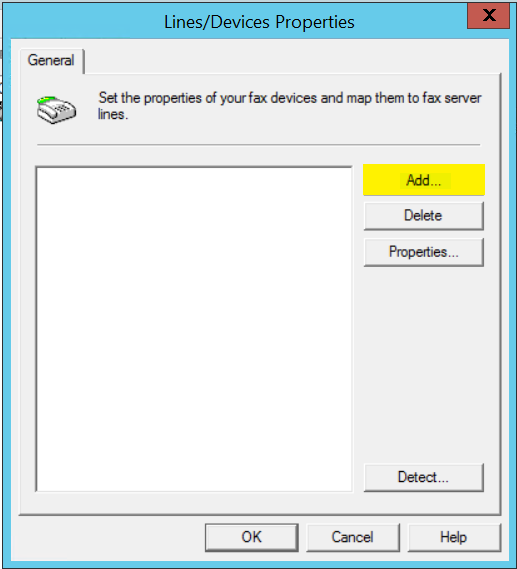
- Go to Start > Programs > FaxMaker Configuration.
- Click Lines and Devices > Properties.
- If given the option to detect modems, click No.
- To add a new line, click Add.
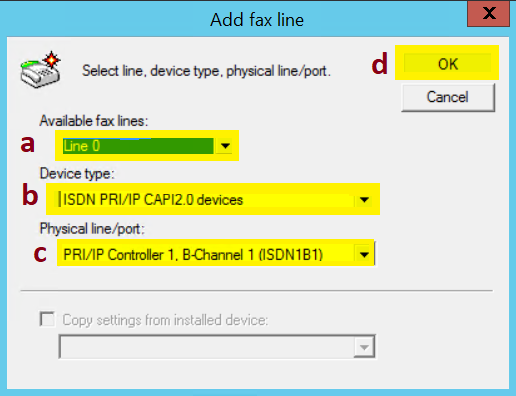
- Under Available fax lines (a), select any available line.
- Under Device type (b), select “ISND PIR/IP CAPI2.0 devices”.
- Under Physical line/port (c), select PRI/IP Controller 1, B-channel 1 (ISDN1B1)
- To create the new line, click OK (d).
- In the Device ISDN1B1 on line number 0 Properties pop-up window, select TE0SYSTEMS XCAPI from the ISDN type drop-down.
- Click OK.
- If needed, repeat these steps to create additional lines.
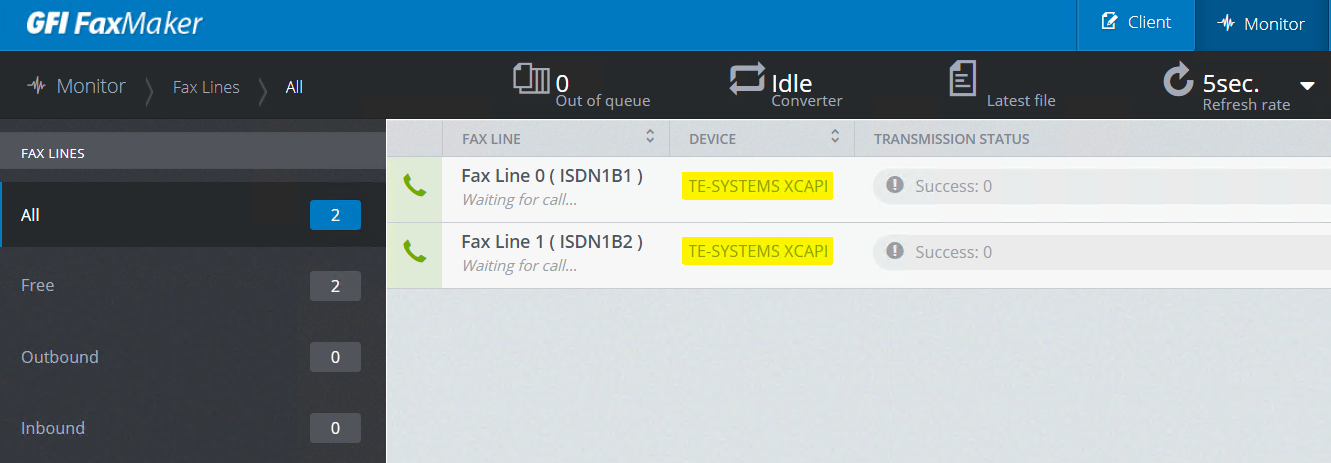
- To check if the lines are added properly, go to FaxMaker Web Interface > Monitor > Fax Lines, and see if the new lines are listed.

Configuring XCAPI with a Specific Call Manager or PBX
XCAPI can be configured with a variety of call managers or phone systems or even hosted providers. Please see the Configuring or Integrating XCAPI with Different Phone Systems article for more information about this.
Confirmation
To confirm the installation and configuration are completed, verify the XCAPI lines are available in the FaxMaker Monitor and that sending and receiving faxes is possible.
Priyanka Bhotika
Comments