Overview
XCAPI is a software-only Fax over IP (FoIP) solution from TE-Systems. It is a software suite that contains a driver, a test tool, a line monitor, and a trace system for troubleshooting. This article provides information on different subsections of XCAPI Configuration and emphasizes key settings that you will use.
Solution
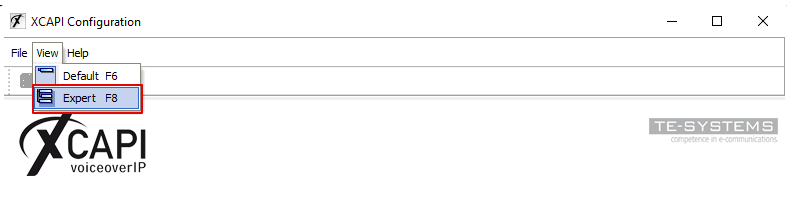
- To access the XCAPI Configuration, go to Start > Programs > XCAPI > XCAPI Configuration.
- To turn the expert view on, choose View, then select Expert. You can use the keyboard shortcut F8 as an alternative.
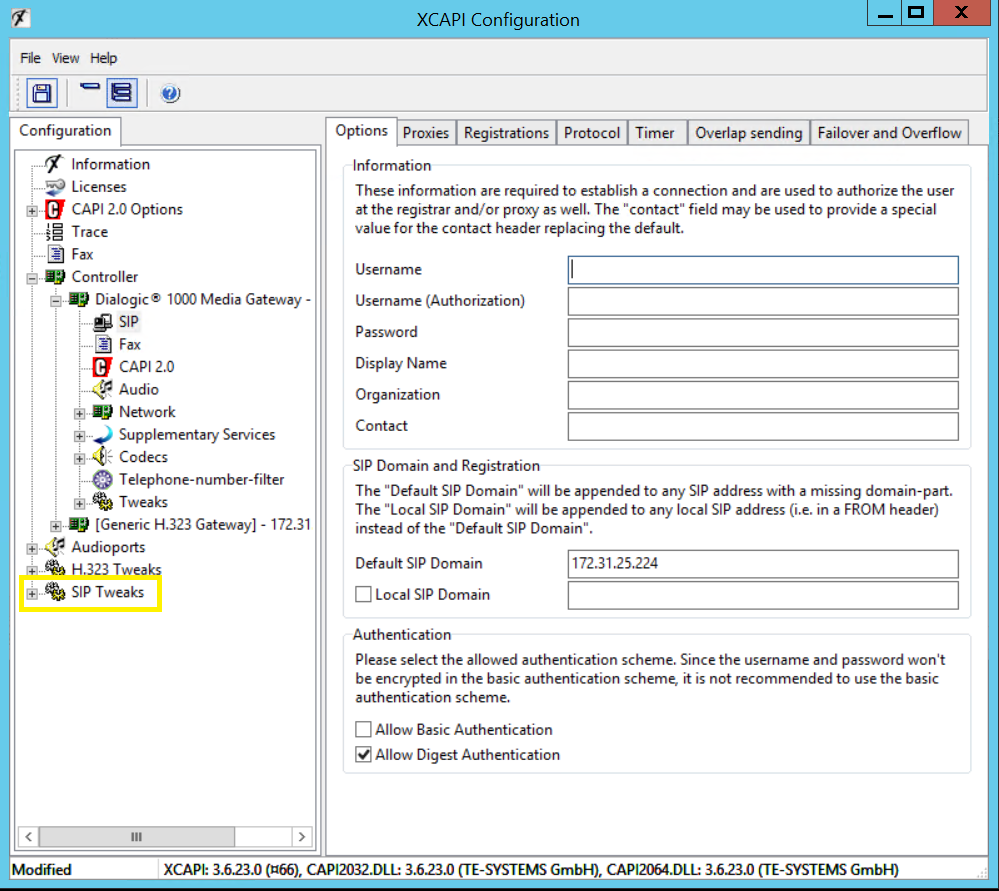
- Once the expert view is turned on, the XCAPI configuration window should look as follows.
- Please find the configuration subsections below.
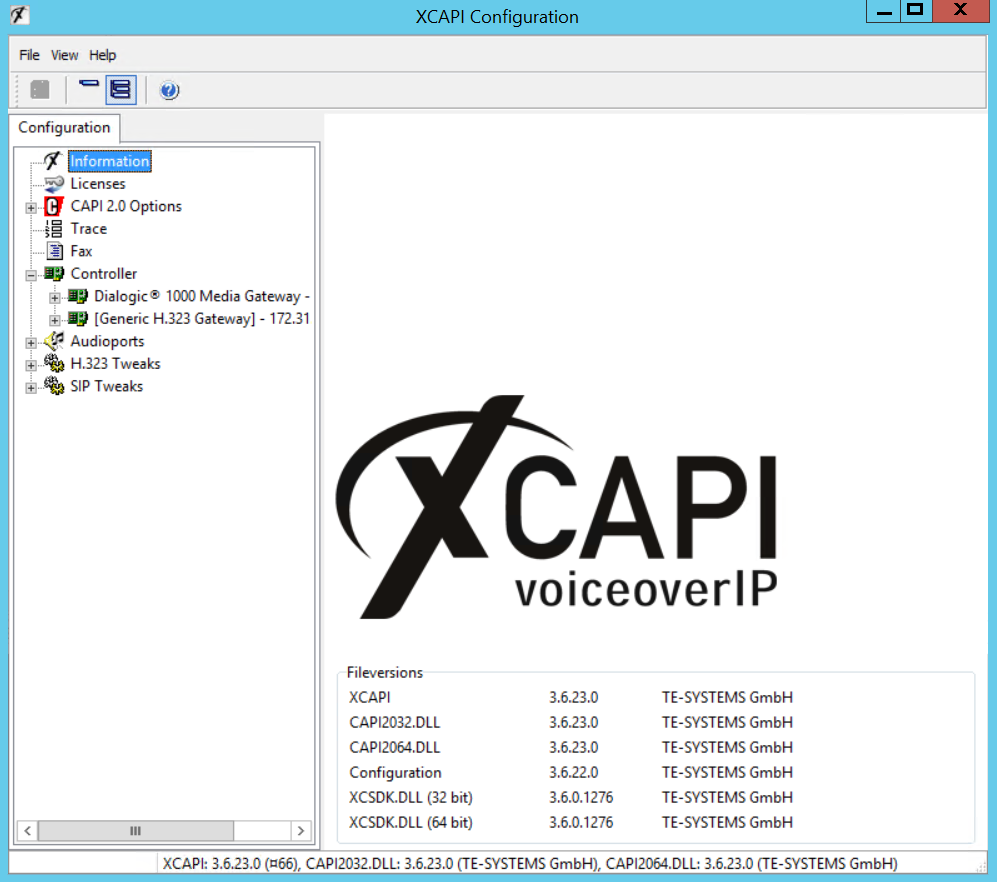
Below, you can find a review of each section and the key settings you might need.
| Licenses |
|
The licensing configuration is covered in the article on Configuring XCAPI Licensing. |
| CAPI 2.0 Options |
|
Under the CAPI 2.0 Options tab, the key configuration setting you need is G.711.
|
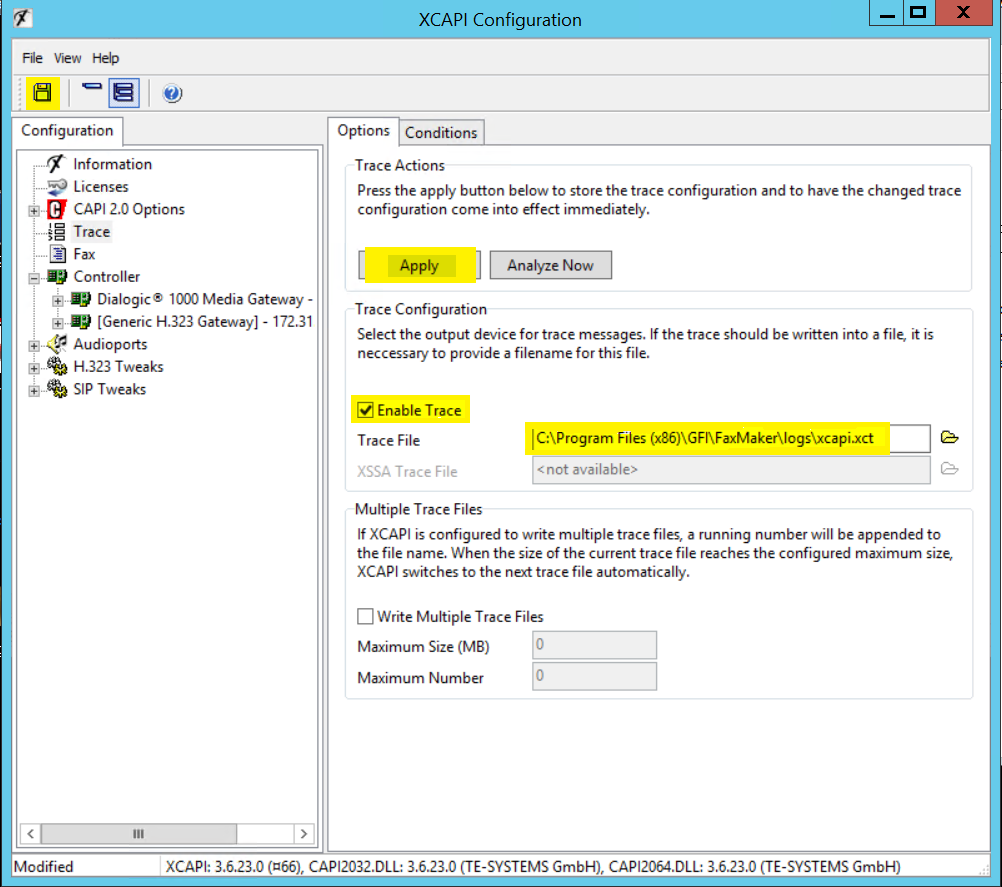
| Trace |
|
The XCAPI trace is a built-in diagnostic tool for troubleshooting FoIP calls. In case you use FaxMaker with XCAPI, it takes the place of Wireshark. It captures and usually logs call failures. Here are the key settings you might need:
|
| Fax |
|
This node contains information about whether G.711 or T.38 is being used. If the latter is used, it also includes information on associated signaling. |
| Controller Settings |
|
The controller settings are subject to change with respect to the controller you added. When you choose the controller you added, two tabs appear. The Controller tab displays the controller name/type/description and the number of lines/channels available for use. The Features tab displays several settings, but the key setting is the "Use software fax over audio channels".
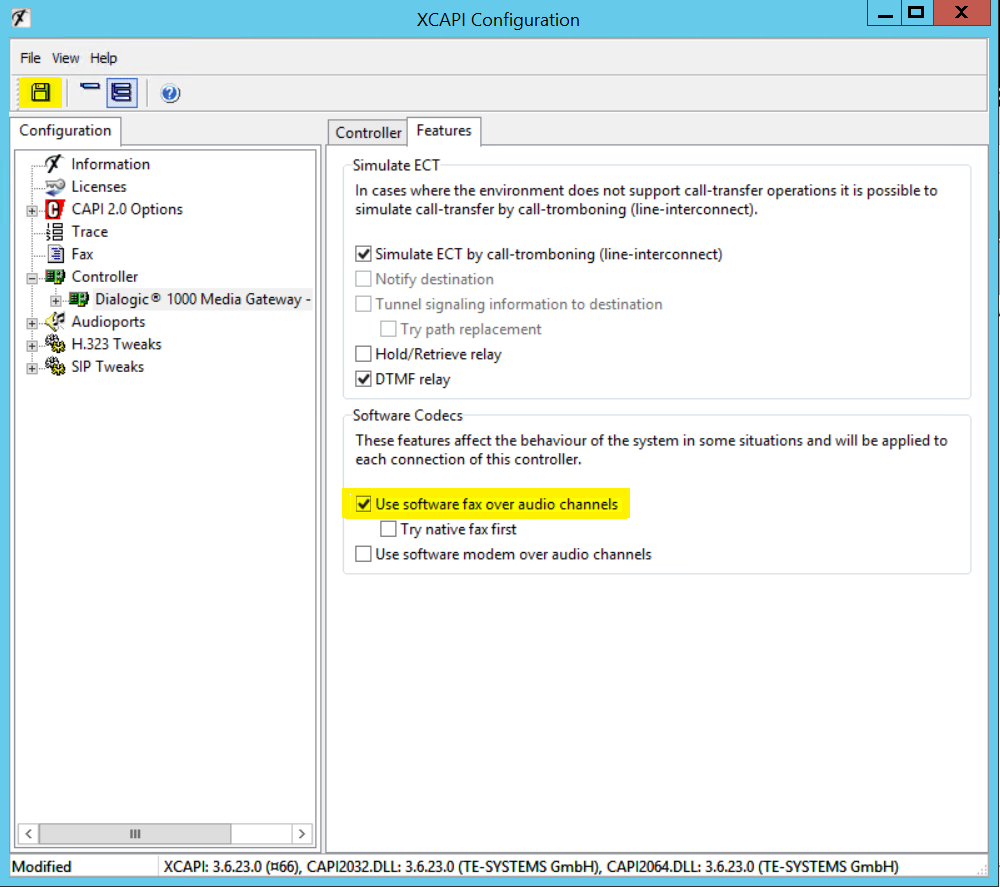 |
| SIP |
|
The tabs that have some key features under this section are as follows:
|
| Codecs |
|
This section involves the available codes. These rarely need to be changed. In certain cases, TE-Systems might request you to configure them. |

Priyanka Bhotika
Comments